

Picture by Editor
# Introducing Gradio
Gradio is a Python framework that modifications how machine studying practitioners create interactive net interfaces for his or her fashions. With just some strains of code, you’ll be able to construct polished functions that settle for varied inputs (textual content, photographs, audio) and show outputs in an intuitive means. Whether or not you are a researcher, knowledge scientist, or developer, Gradio makes mannequin deployment accessible to everybody.
A few of the advantages of Gradio embody:
- It permits you to go from mannequin to demo in minutes
- You don’t want frontend abilities, simply pure Python implementation
- It has help for textual content, photographs, audio, and extra
- You may simply share and deploy domestically, and may also host publicly at no cost
# Putting in Gradio and Primary Setup
To get began with Gradio, it is advisable set up the bundle utilizing the pip command.
Now that you’ve got Gradio put in, let’s create your first Gradio software. First, create a file and title it gradio_app.py then add this code:
import gradio as gr
def greet(title):
    return f"Hiya {title}!"

demo = gr.Interface(
    fn=greet,
    inputs="textual content",
    outputs="textual content",
    title="Greeting App"
)

demo.launch()
Run this with python gradio_app.py, and you will have a working net software at http://127.0.0.1:7860/. The interface supplies a textual content enter, a submit button, and a textual content output — all robotically generated out of your easy specification.
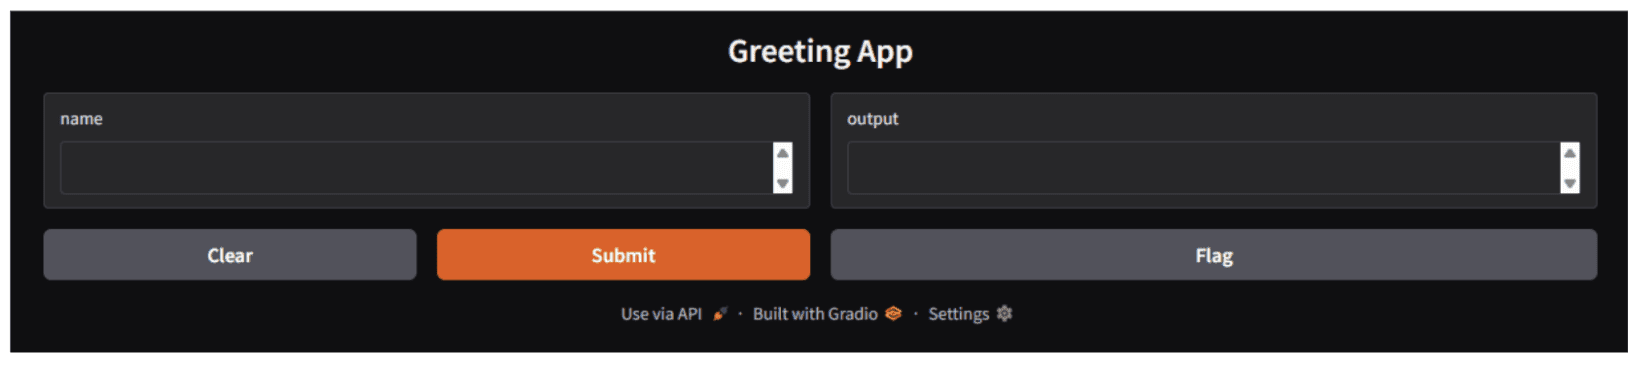
Picture by Writer
// Understanding the Gradio Interface
The gr.Interface class is Gradio’s high-level software programming interface (API) that abstracts away complexity. It requires three important elements:
- Perform (
fn): Your Python perform that processes inputs - Inputs: Specification of enter sort(s)
- Outputs: Specification of output sort(s)
// Exploring Enter and Output Parts
Whereas you need to use easy strings like "textual content", "picture", or "audio" to specify elements, Gradio gives extra management by way of express part courses.
import gradio as gr

demo = gr.Interface(
    fn=lambda x: x,
    inputs=gr.Textbox(strains=2, placeholder="Enter textual content right here..."),
    outputs=gr.Textbox(label="Output")
)
Widespread elements embody:
gr.Textbox(): Multi-line textual content entergr.Picture(): Picture add/previewgr.Audio(): Audio file dealing withgr.Checkbox(): Boolean entergr.Slider(): Numerical vary entergr.Radio(): A number of alternative choicegr.Dropdown(): Choose from choices
// Dealing with A number of Inputs and Outputs
Actual-world functions typically require a number of inputs or produce a number of outputs. Gradio handles this elegantly with lists.
import gradio as gr

def process_form(title, is_morning, temperature):
    greeting = "Good morning" if is_morning else "Hiya"
    message = f"{greeting}, {title}! Temperature: {temperature}°C"
    return message, temperature * 1.8 + 32  # Convert to Fahrenheit

demo = gr.Interface(
    fn=process_form,
    inputs=[
        gr.Textbox(label="Name"),
        gr.Checkbox(label="Is it morning?"),
        gr.Slider(0, 100, label="Temperature (°C)")
    ],
    outputs=[
        gr.Textbox(label="Greeting"),
        gr.Number(label="Temperature (°F)")
    ]
)

demo.launch()
Output:
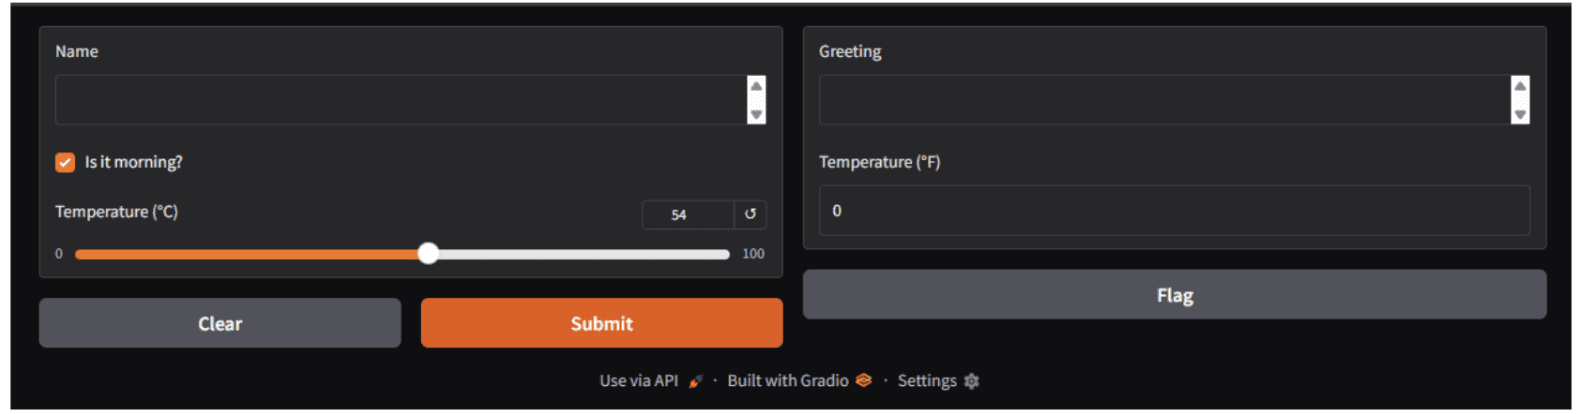
Picture by Writer
When utilizing a number of inputs, your perform should settle for the identical variety of parameters. Equally, a number of outputs require your perform to return a number of values.
// Processing Pictures
Gradio makes picture processing fashions extremely straightforward to demo:
import gradio as gr
import numpy as np

def apply_sepia(picture):
    # Picture comes as numpy array with form (top, width, channels)
    sepia_filter = np.array([[0.393, 0.769, 0.189],
                             [0.349, 0.686, 0.168],
                             [0.272, 0.534, 0.131]])
    sepia_image = picture.dot(sepia_filter.T)
    sepia_image = np.clip(sepia_image, 0, 255).astype(np.uint8)
    return sepia_image

demo = gr.Interface(
    fn=apply_sepia,
    inputs=gr.Picture(label="Enter Picture"),
    outputs=gr.Picture(label="Sepia Filtered"),
    title="Sepia Filter App"
)

demo.launch()
Output:

Picture by Writer
The gr.Picture part robotically handles file uploads, previews, and converts photographs to NumPy arrays for processing.
// Dealing with Audio Processing
Audio functions are simply as easy:
import gradio as gr

def transcribe_audio(audio):
    return "Transcribed textual content would seem right here"

demo = gr.Interface(
    fn=transcribe_audio,
    inputs=gr.Audio(label="Add Audio", sort="filepath"),
    outputs=gr.Textbox(label="Transcription"),
    title="Speech-to-Textual content Demo"
)
demo.launch()
In an actual software, you’d name a speech recognition mannequin contained in the transcribe_audio(audio) perform. For demonstration, we’ll return a placeholder.
Output:

Picture by Writer
# Creating Superior Layouts with Gradio Blocks
Whereas gr.Interface is ideal for easy functions, gr.Blocks gives full management over structure and knowledge circulation. Consider Blocks because the low-level API that allows you to construct advanced, multi-step functions.
// Implementing a Primary Blocks Instance
import gradio as gr

def greet(title):
    return f"Hiya {title}!"

with gr.Blocks() as demo:
    name_input = gr.Textbox(label="Your Identify")
    greet_button = gr.Button("Greet")
    output = gr.Textbox(label="Greeting")

    greet_button.click on(
        fn=greet,
        inputs=name_input,
        outputs=output
    )

demo.launch()
Output:

Picture by Writer
// Constructing Complicated Layouts with Rows and Columns
This is a extra subtle instance integrating with Transformers. Be certain that the Transformers bundle is put in in your laptop.
pip set up transformers

import gradio as gr
from transformers import pipeline

# Load a translation mannequin
translator = pipeline("translation_en_to_de", mannequin="t5-small")

def translate_text(textual content):
    consequence = translator(textual content, max_length=40)[0]
    return consequence['translation_text']

with gr.Blocks(title="English to German Translator") as demo:
    gr.Markdown("# 🌍 English to German Translator")

    with gr.Row():
        with gr.Column():
            english_input = gr.Textbox(
                label="English Textual content",
                placeholder="Enter textual content to translate...",
                strains=4
            )
            translate_btn = gr.Button("Translate", variant="major")

        with gr.Column():
            german_output = gr.Textbox(
                label="German Translation",
                strains=4
            )

    # Add instance prompts
    gr.Examples(
        examples=[
            ["Hello, how are you?"],
            ["The weather is beautiful today"],
            ["Machine learning is fascinating"]
        ],
        inputs=english_input
    )

    translate_btn.click on(
        fn=translate_text,
        inputs=english_input,
        outputs=german_output
    )

demo.launch()
Output:

Picture by Writer
# Managing State in Gradio Functions
State administration is essential for interactive functions. Gradio supplies two approaches: international state and session state.
// Managing Session State (Person-Particular)
For user-specific state, use Gradio’s built-in state administration. The next instance demonstrates a easy chatbot logic utilizing state to take care of dialog historical past.
import gradio as gr

with gr.Blocks() as demo:
    chatbot = gr.Chatbot(label="Dialog")
    msg = gr.Textbox(label="Your Message")
    clear = gr.Button("Clear")

    state = gr.State([])

    def user_message(message, historical past):
        # Replace historical past with consumer message and placeholder for bot
        return "", historical past + [[message, None]]

    def bot_response(historical past):
        # Easy echo bot logic
        response = f"I acquired: {historical past[-1][0]}"
        historical past[-1][1] = response
        return historical past

    msg.submit(
        user_message,
        [msg, state],
        [msg, state]
    ).then(
        bot_response,
        state,
        chatbot
    )

    clear.click on(lambda: (None, []), None, [chatbot, state])

demo.launch()
# Deploying and Sharing Your Functions
For fast sharing, Gradio can create a public URL:
This generates a brief, publicly accessible hyperlink good for demos and fast sharing with colleagues. It’s sometimes legitimate for 72 hours.
Without spending a dime, everlasting internet hosting:
- Create a Hugging Face account
- Create a brand new House with Gradio because the software program growth equipment (SDK)
- Add your software recordsdata:
app.py(your primary software file) andnecessities.txt(Python dependencies). An instance of what ought to be within thenecessities.txtfile:
git add .
git commit -m "Preliminary commit"
git push
Your software can be accessible at https://huggingface.co/areas/your-username/your-space-name.
Gradio functions could be deployed on any platform that helps Python net functions:
- Use
demo.launch(server_name="0.0.0.0", server_port=7860) - Bundle your software with all dependencies inside a Docker container
- Deploy on AWS, Google Cloud, Azure, and different platforms
# Constructing an Picture Classification Dashboard
Placing all the things now we have realized collectively, let’s construct a venture. This venture is a straightforward picture classification dashboard constructed with PyTorch and Gradio. It permits customers to add a picture by way of an internet interface and obtain the highest 5 predicted courses generated by a pre-trained deep studying mannequin.
We are going to use ResNet-50, a widely known convolutional neural community educated on the ImageNet dataset. As a result of the mannequin is pre-trained, the venture doesn’t require any customized coaching or labeled knowledge. It’s meant for demonstration, experimentation, and academic functions reasonably than manufacturing use.
We are going to use Gradio to offer a light-weight consumer interface so customers can work together with the mannequin immediately from a browser.
import gradio as gr
import torch
from torchvision import fashions, transforms
from PIL import Picture

# Load pre-trained mannequin
mannequin = fashions.resnet50(pretrained=True)
mannequin.eval()

# Preprocessing
preprocess = transforms.Compose([
    transforms.Resize(256),
    transforms.CenterCrop(224),
    transforms.ToTensor(),
    transforms.Normalize(
        mean=[0.485, 0.456, 0.406],
        std=[0.229, 0.224, 0.225]
    )
])

def classify_image(picture):
    picture = Picture.fromarray(picture)
    input_tensor = preprocess(picture)
    input_batch = input_tensor.unsqueeze(0)

    with torch.no_grad():
        output = mannequin(input_batch)

    # Get high 5 predictions
    possibilities = torch.nn.purposeful.softmax(output[0], dim=0)
    top5_prob, top5_catid = torch.topk(possibilities, 5)

    outcomes = []
    for i in vary(top5_prob.dimension(0)):
        outcomes.append(f"Class {top5_catid[i].merchandise()}: {top5_prob[i].merchandise()*100:.2f}%")

    return "n".be a part of(outcomes)

demo = gr.Interface(
    fn=classify_image,
    inputs=gr.Picture(label="Add Picture"),
    outputs=gr.Textbox(label="High 5 Predictions"),
    title="Picture Classifier"
)

demo.launch()
# Wrapping Up
Gradio makes machine studying deployment straightforward by eliminating the normal obstacles between mannequin growth and consumer interplay. With this crash course, you have realized the basics of making Gradio interfaces, component-based design for various enter/output varieties, superior layouts utilizing Gradio Blocks, state administration for interactive functions, and deployment methods for sharing your work.
The true energy of Gradio lies in its simplicity and suppleness. It would not matter in case you’re constructing a fast prototype for inside testing or a elegant software for public use; Gradio supplies the instruments it is advisable deliver your machine studying fashions to life.
Shittu Olumide is a software program engineer and technical author keen about leveraging cutting-edge applied sciences to craft compelling narratives, with a eager eye for element and a knack for simplifying advanced ideas. You may as well discover Shittu on Twitter.